
If you make fishing videos, and like to record the underwater footage from your fishing cameras, then you understand how frustrating it can be. I will show you all the options available and how to get the highest quality video possible.
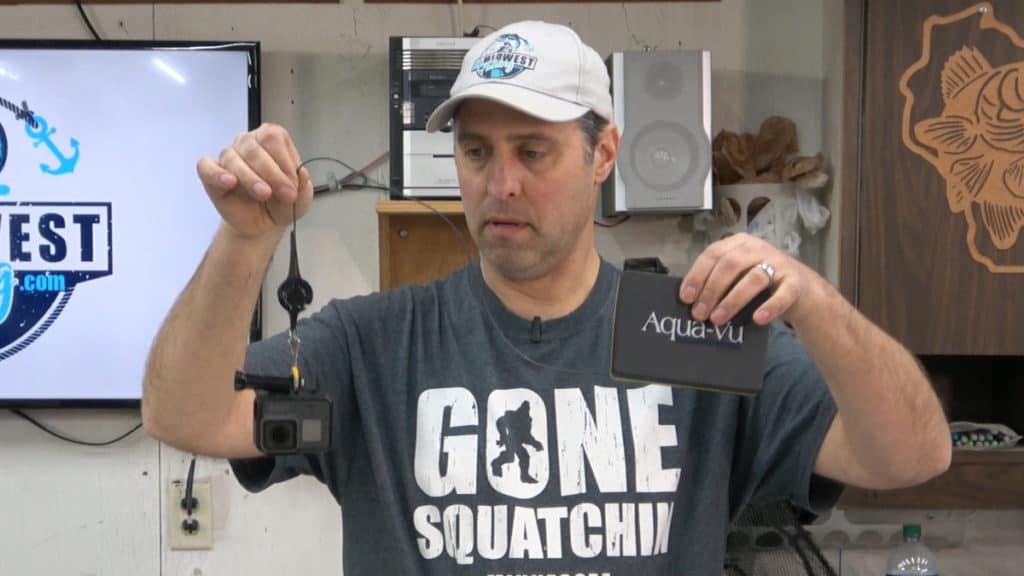
The highest quality video you can currently record from the available fishing cameras right now is 1080p. For those of us looking for higher quality video like 4K, I have an answer. The best solution I found is to connect an action camera, like a GoPro to the bottom of your fishing camera.
Here’s why this is the best set up for recording in high definition. First of all, only a few fishing cameras, (Like the Aqua-vu Revolution Pro and Marcum Recon 5 Plus) have built in DVR’s. To record from the other models, it gets really complicated. ( I will explain that process later)
To record with a GoPro, you can either put it on a long stick, or lower it down on a string, but you will have no idea what you are recording. By connecting it to your fishing camera, you can see what you are looking at on its screen, while recording the footage on the GoPro.
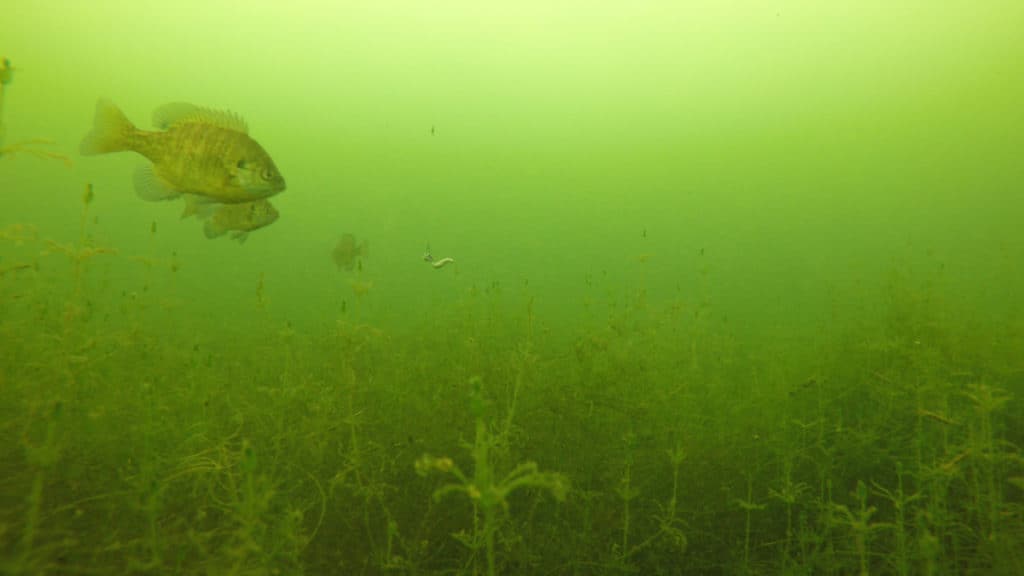
I’ve tested this system in the real world, and there is no comparison between the GoPro video quality and my Aqua-Vu footage.

*Note: The photos here have been resized and compressed for quick loading. Watch the video below for a more accurate representation.
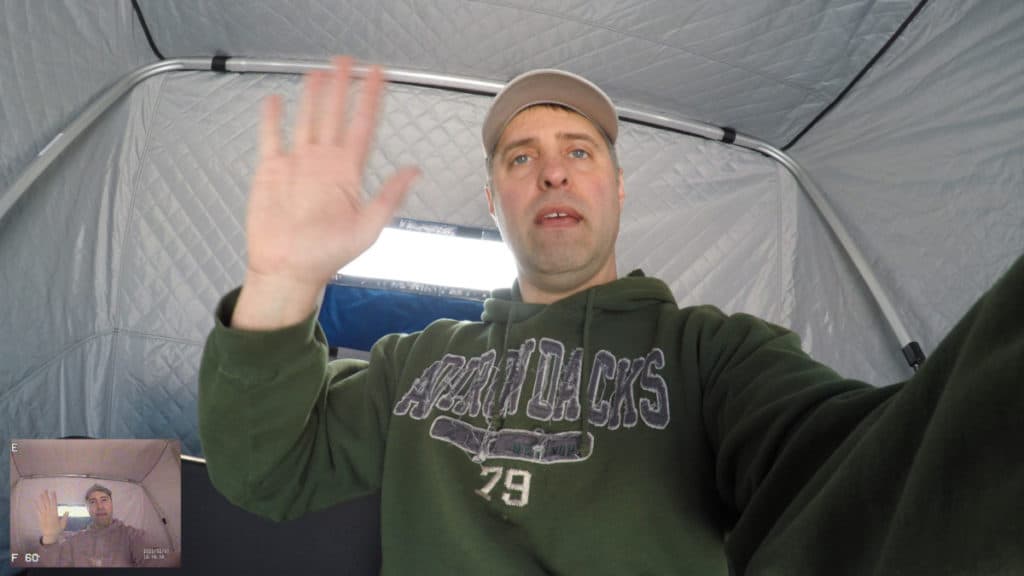
The above picture is a screen capture from a video made in 4K. The larger picture is video recorded in 4K on a GoPro hero 5 black. The little video in the lower left corner is what you get when you record from an Aqua-Vu Revolution Pro. The size and quality difference is hard to miss.
I will go over all the details on how to capture the best underwater footage that’s available to the average fisherman, like you and me. First you will need an underwater fishing camera. Lets discuss what cameras are availabe on the market, and which one is best for you.
You basically have three options. Aqua-Vu, Marcum, and Generic.
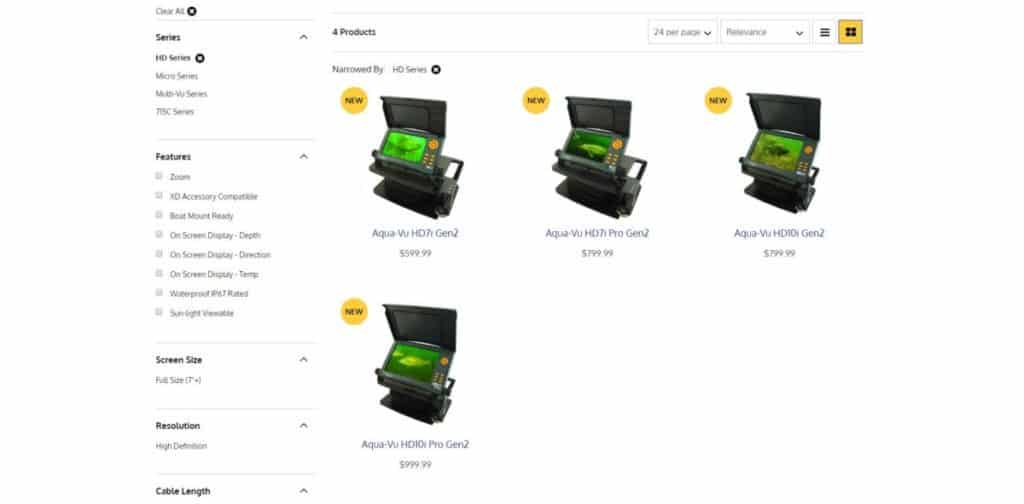
Aqua-Vu Fishing Cameras
See the full comparison sheet here.
Full size cameras
| amera | DVR | Camera Resolution | Screen Resolution | Video Out | Battery Life | Price |
|---|---|---|---|---|---|---|
| 715C | no | 644×488 | 800×480 | RCA | 10 HRS | $300 |
| HD7i | no | 1080p | 800×480 | HDMI | 8 HRS | $600 |
| HD7i Pro | no | 1080p | 800×480 | HDMI | 3.5 HRS | $800 |
| HD10i | no | 1080p | 1280×800 | HDMI | 2.5 HRS | $800 |
| HD10i Pro | no | 1080p | 1280×800 | HDMI | 2.5 HRS | $1000 |
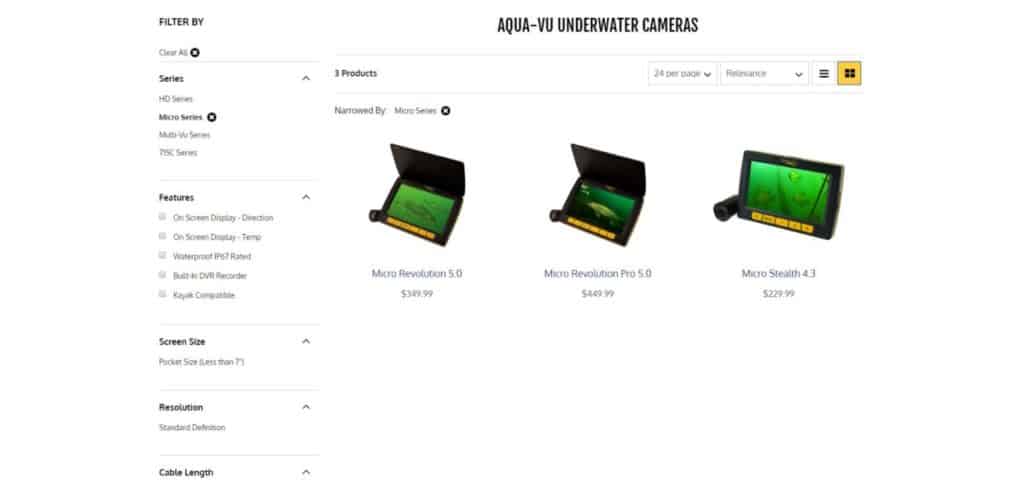
Micro Series
| Camera | DVR | Camera Resolution | Screen Resolution | Video Out | Battery Life | Price |
|---|---|---|---|---|---|---|
| Stealth | no | 648×488 | 480×272 | RCA | 6 HRD | $240 |
| Revolution | no | 960×576 | 800×480 | RCA | 6.5 HRS | $370 |
| Revolution Pro | yes | 960×576 | 800×480 | RCA | 6.5 HRS | $450 |
A couple things to note about the Aqua-Vu cameras. First, the camera resolution is different from the screen resolution. Next, the video out is either HDMI or RCA. This will matter once we start talking about recording video. Speaking of recording, notice that they only have one model that has a built in DVR. Now lets see what Marcum has to offer.
Marcum Fishing Cameras
Download the comparison sheet here.
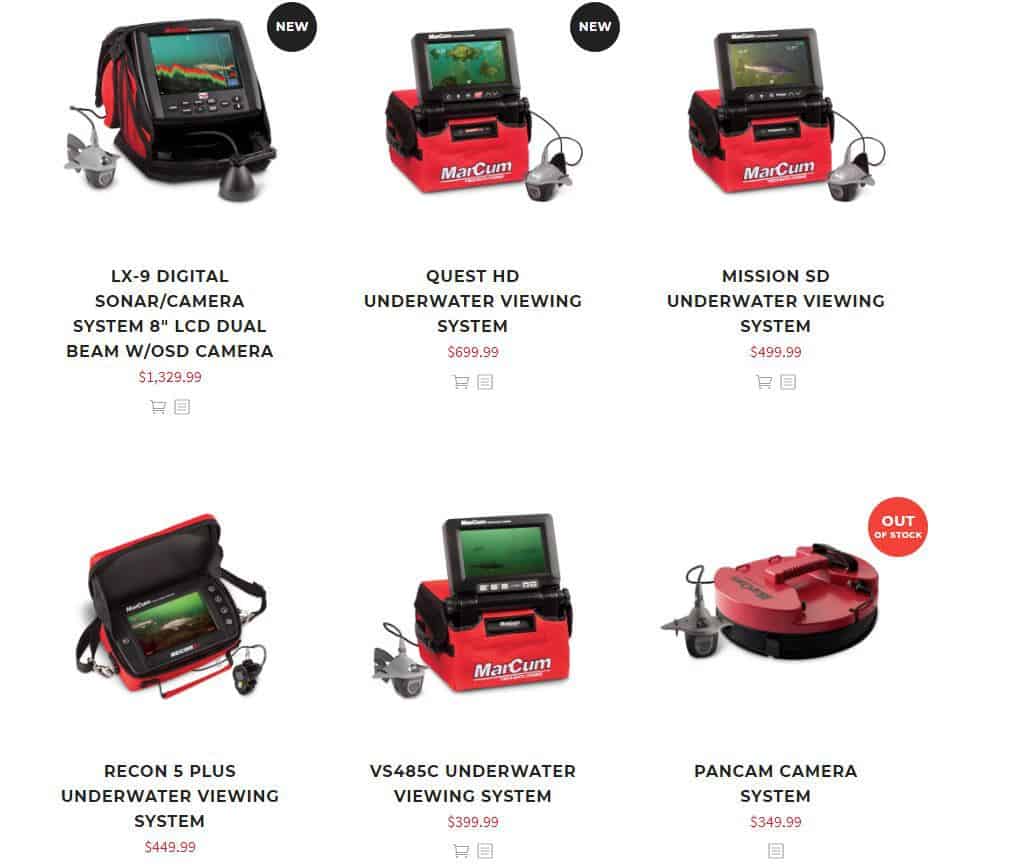
Marcum Cameras
| Camera | DVR | Resolution* | Video Out | Battery Life | Price |
|---|---|---|---|---|---|
| Recon 5 | no | 800×480 | RCA | 6 HRS | $320 |
| Recon 5+ | yes | 800×480 | RCA | 6 HRS | $450 |
| VS485C | no | 800×480 | RCA | 8 HRS | $400 |
| Mission SD | no | 800×480 | RCA | 8 HRS | $500 |
| Quest HD | no | 800×480* | HDMI | 8 HRS | $700 |
| LX-9 | yes | 800×600 | RCA | 8 HRS | $1,330 |
*Resolution: Marcum specs only say “resolution.” They don’t specify whether it’s a camera or screen resolution. The Quest HD specs mention a Sony 1080p camera, even though the resolution states, 800×480. The Quest is the only camera that says anything about the camera resolution.
My thoughts on the Marcum cameras: First of all, it is very difficult to find the specs of all their cameras. Even the comparison sheet put out by Marcum isn’t consistent. For example, it states the battery life for the Recon cameras, but for the other cameras, I had to search the manuals, and for a few I had to search the internet looking for any possible info. Luckily I did find one source that had good info on the few remaining ones I had left.
Marcum has two models with built in DVR’s. The Recon 5+ and the LX-9. The Aqua-Vu has a built in 8GB memory on the Revolution Pro. The Marcum uses a removable SD card, which I like much better.
Now lets look at whats available from places like Amazon.
Generic Fishing Cameras
Generic cameras found on Amazon
I searched Amazon for underwater fishing cameras, and listed my favorites below.
| Camera | DVR | Resolution* | Battery Life | Price |
|---|---|---|---|---|
| Eyoyo | no | 1000 TVL | 6-8 HRS | $140 |
| Eyoyo Pro | yes | 1000 TVL | 10 HRS | $210 |
| Lucky | yes | 420 TVL (690×480) | N/A** | $150 |
| Moocor | no | 1000 TVL | 8 HRS | $140 |
*Resolution: Since these cameras are made in foreign countries (not in the USA) they express resolution in TVL (TV lines). They don’t mention if it is vertical or horizontal lines, but some mention the amount of pixels. From what I can calculate, these resolutions are equivalent to 600×800 or less.
**The Lucky brand camera is the only one I couldn’t find a battery life for.
My thoughts on generic cameras: First of all, the most appealing aspect of these cameras, is price. If cost is your main concern, then this might be your best option.
My main concern with these cameras is quality of the video. For example, the Lucky camera says it has “super high resolution,” at only 690X480. That resolution is so low, it is almost useless for recording.
Now if you record video how I mentioned earlier by using a camera such as a GoPro, then the fish camera resolution really doesn’t matter. We would only be using the camera to know what the GoPro is pointing at.
Now that we compared fishing cameras, lets take a closer look at how to record video from them.
Recording Video With An Underwater Fishing Camera
There are two ways to record with your underwater camera. You can record with your cameras built in DVR, or you can record from the video out port to an external DVR.
As you can see from the comparison charts above, they only make a few models with a built in DVR. I believe the Aqua-Vu is the only one with a built in memory. The rest have a removable SD card. The Aqua-Vu Revolution Pro has 8GB of internal storage. I’ve recorded quite a bit of video to that 8GB. At first I thought it wasn’t nearly enough, but the video is such low resolution, it doesn’t take up much space.
Personally, I prefer a removable card. That way I can control the amount of space I need. If I go on a week long fishing trip, I can always bring extra SD cards if I start to run out of space.
Now we are going to discuss the other way to record. This is where I throw up my hands and say “WHY!”
I will just go over the basics here so you can understand why it gets so frustrating. If you want a more in depth tutorial on how to record this way, I found a video from Nicole Stone that explains it well.
For this, you will need to determine which type of video out your camera has. It will either be an AV port (RCA connector) or an HDMI. The AV ports are an older technology and found on older or cheaper models. Most higher end cameras will have HDMI.
The idea here is that you will plug a cable from the video out of your camera to the input of an external DVR. This seems simple enough, but there is more to it than that.
You will need to get a DVR that will work properly. Most DVR’s are made for home use and are quite expensive. These are not devices you want to bring on the lake. What most people do is use a game capture device like the one below. These are used for recording video games, but work well in this situation too.

If you have a camera with an HDMI output, you can connect it directly to the game capture device. If your camera uses RCA cables, then you will also need an RCA to HDMI converter like the one below.

Plug an RCA cable from the camera to the converter. Then attach a HDMI cable from the converter to the game capture device.
Now that you have signal going to your recording device, you still need to power all of this. A portable charger like the Anker Powercore works well. This is the one I use. It has two power outlets and is small but powerful.

If you need the converter, then you will need the charger with two power outlets. Otherwise one outlet will work. Use a USB cord and connect it to your charger and the other end to the converter and the game capture device.
I hope you can see by now that this gets complicated real quick. When you are fishing, the last thing you need to be doing is dealing with this conglomerate of cables and devices. If you want to use the video you capture to make high quality underwater videos, I think you will be disappointed. You will see why as we discuss video resolution next.
Lets Compare Video Resolutions
If you have been TV shopping in the last few years, then you are familiar with terms like, “4K, 1080p, and 720p.” These terms refer to the resolution of the TV’s. The resolution tells you how many pixels are on the screen. For example, a screen with a resolution of 1920×1080, has 2,073,600 pixels. You can get that number by multiplying 1920 by 1080. The table below will give examples of different resolutions.
| Name | Length | Height | Pixels |
|---|---|---|---|
| 4K | 3840 | 2160 | 8,294,400 |
| 2K | 2560 | 1440 | 3,686,400 |
| 1080p | 1920 | 1080 | 2,073,600 |
| 720p | 1280 | 720 | 921,600 |
| Low Res | 640 | 480 | 307,200 |
Note that the above table refers to video in the 16:9 aspect ratio, which is what most devices use these days. If you plan on uploading your videos to YouTube, this is the format they prefer.
A 4:3 ratio used to be the standard before the invention of the wide, flat panel TV. The Low Res column above is comparable to the TV’s we had back in the 1980’s.
Now go back and review the camera resolutions in the tables above. You will notice that the highest camera resolution is 1080p. You will also notice that none of the cameras with a 1080p resolution have built in DVR’s. That means you will have to set up the external DVR with all the wires we just discussed to capture that 1080p footage.
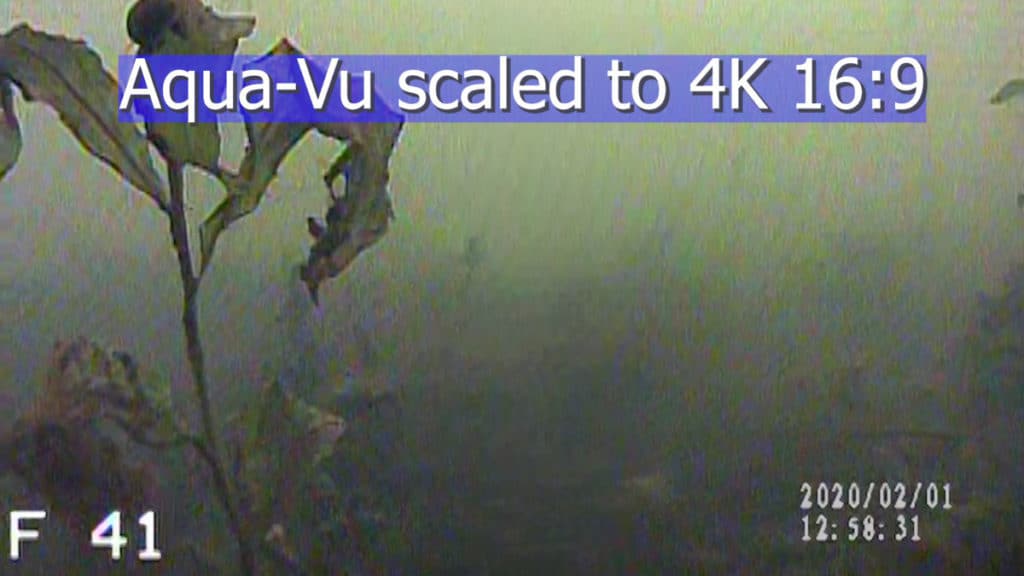
The built in DVR is awesome, but the quality is just not high enough. Here is another example of the difference in quality between 4K video recorded on a GoPro, compared to the 720×480 video recorded on my Aqua-Vu Revolution Pro. (The specs show a 960×576 camera resolution. The video I recorded was only 720×480. Maybe I have an older model, or maybe it records in a lower resolution than the camera.)
Here is the Aqua-Vu video scaled up to 4K in Adobe Premiere.
Here is the same video recorded on a GoPro Hero 5 Black.
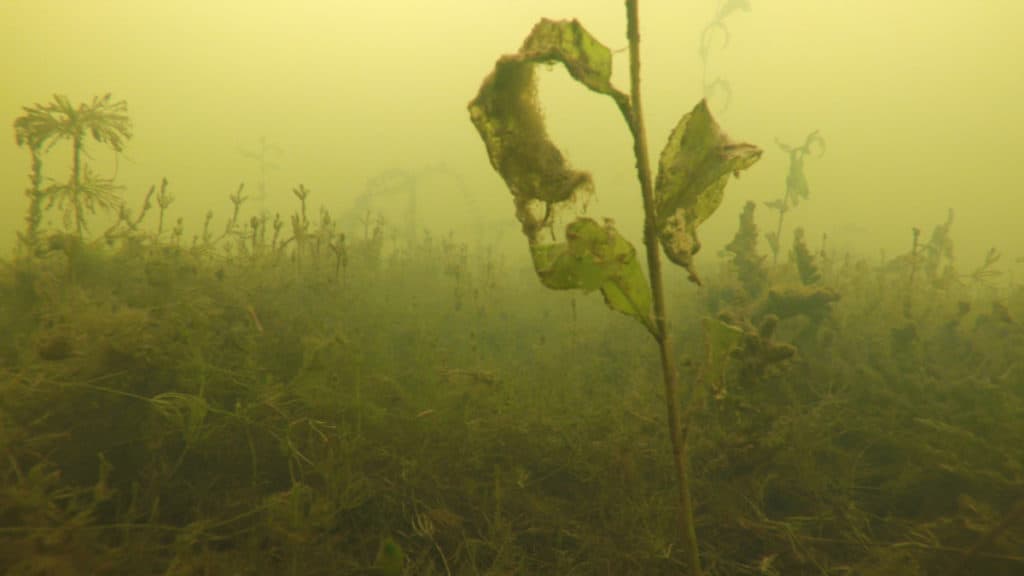
It is possible to just scale the video to a bigger size, but it doesn’t improve the quality. In fact, it only magnifies the poor quality.
*Note: The images here are compressed for faster loading. To get a better idea of the quality difference, watch the video I made on this same topic.
Why Does Video Quality Matter
If you are recording video for your own use, to review and learn from your previous fishing trips, then it really doesn’t matter all that much.
If you are like me, and are trying to make high quality fishing videos to share with other people, then it matters a lot.
It also matters if you are uploading your videos to YouTube. I used to record my fishing videos in 1080p. They look great when viewing the original footage on my computer, but when I upload the same video to YouTube, it looks terrible. This is because YouTube compresses your video.
If you upload a video to YouTube in 2K or 4K, YouTube allows a higher bit rate for these videos, and thus, a much clearer video. Not only that, but YouTube gives a higher priority to these videos in the search results.
Best Set Up For Recording Underwater Video
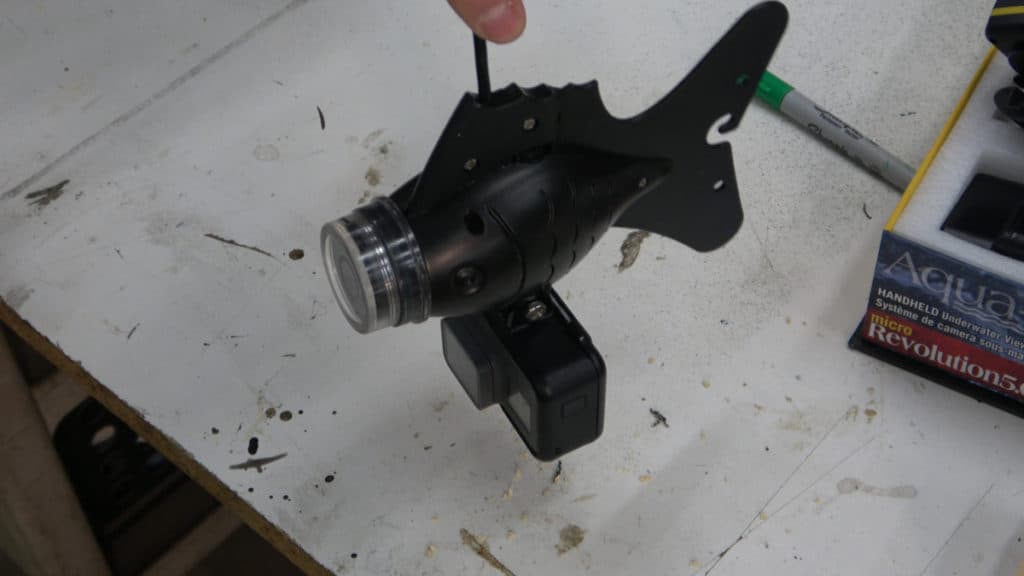
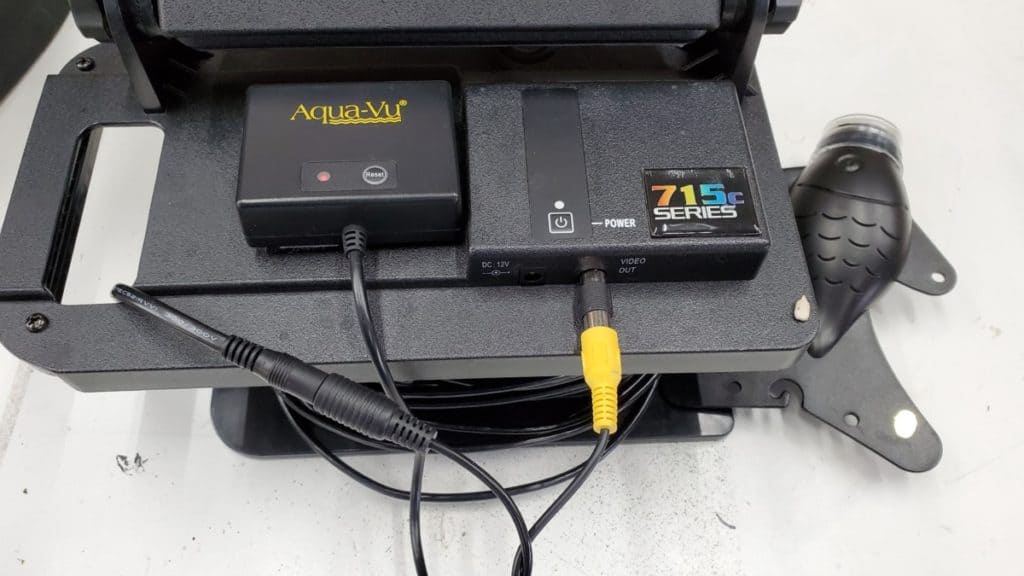
As you saw in the first picture in this post, I simply connect a GoPro to the bottom of my fishing camera. This allows me to see what I’m recording on my fishing camera, while doing the recording on the GoPro.
I connected my GoPro to an Aqua-Vu 715c and a Revolution Pro. Depending on what type of camera you have, you might have to get creative on ways to attach it. I will show you how I did it.
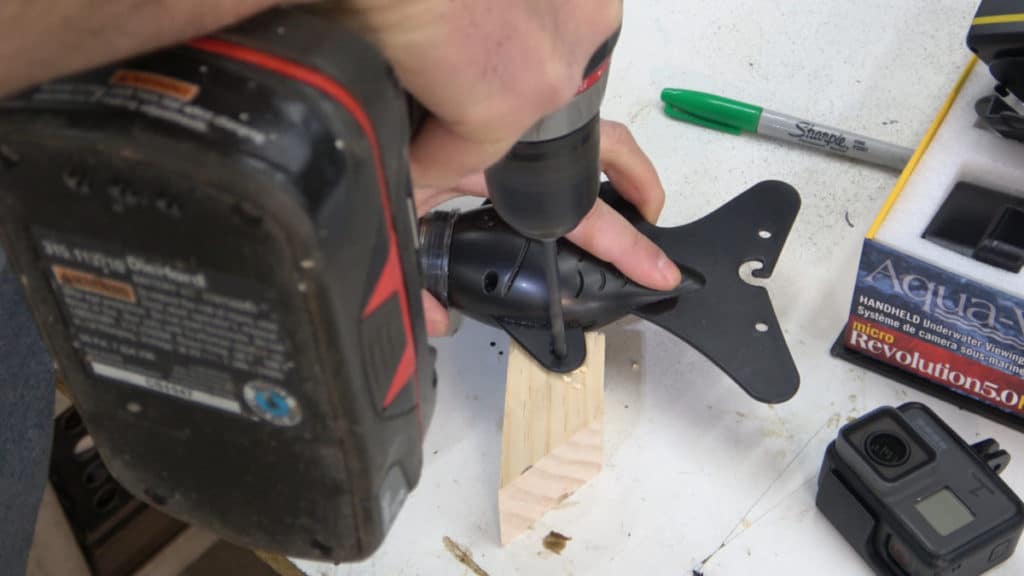
First, the Aqua-Vu 715c. I have the older fish looking camera. This worked well because it has a fin that hangs down. The GoPro case has two tabs that slide right over this fin.
I drilled a hole in the fin so I could slide the bolt through it.
Then it’s as simple as sliding on the GoPro and putting the bolt through it.
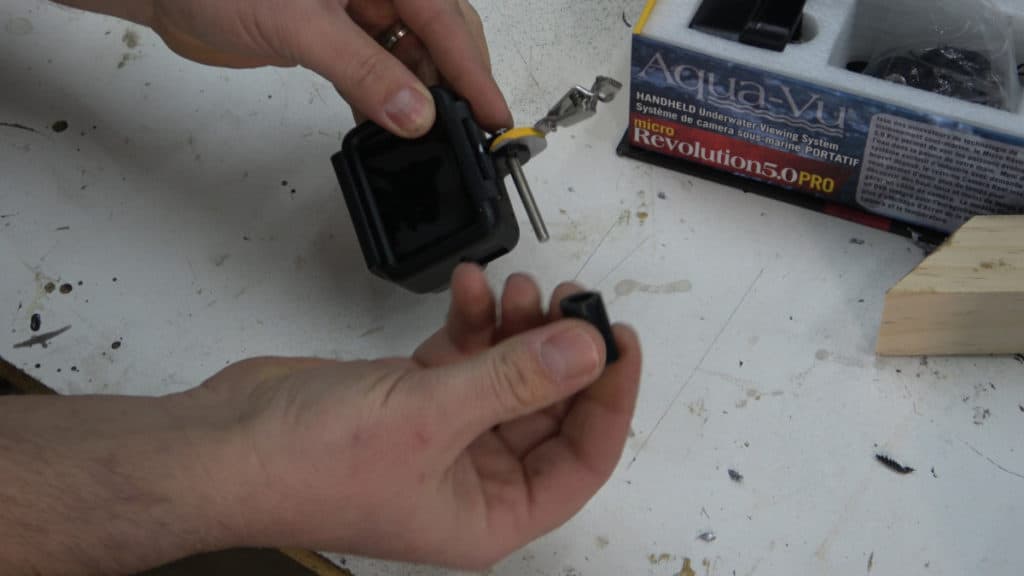
Now lets look at the Aqua-Vu Revolution Pro. This camera comes with a smaller camera, so it has a weight that attaches with a clip to help control the camera. I connected the GoPro to this weight, so I could just clip it on.
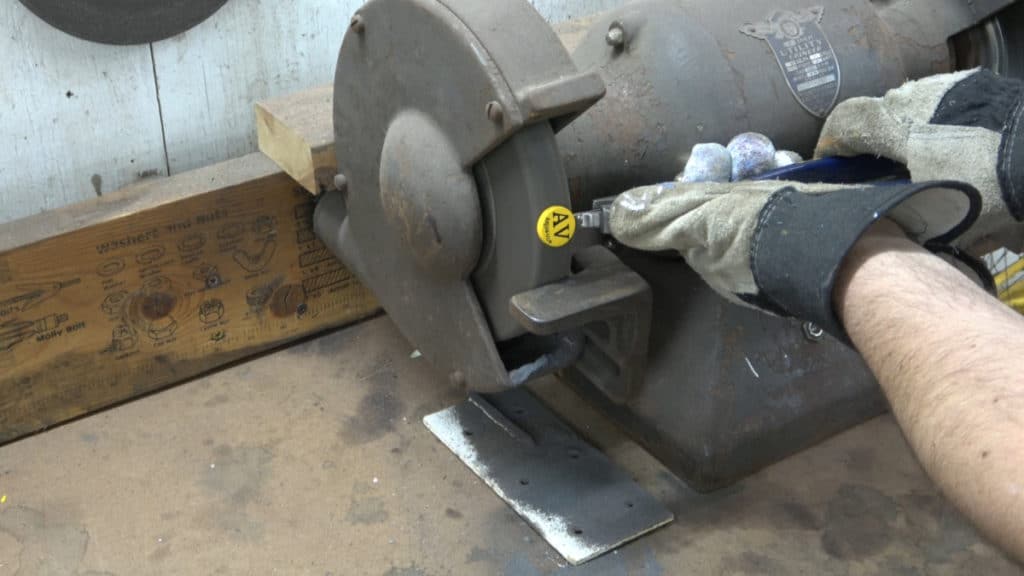
The weight was a little too thick for the GoPro case to slide over, so I had to grind it down.
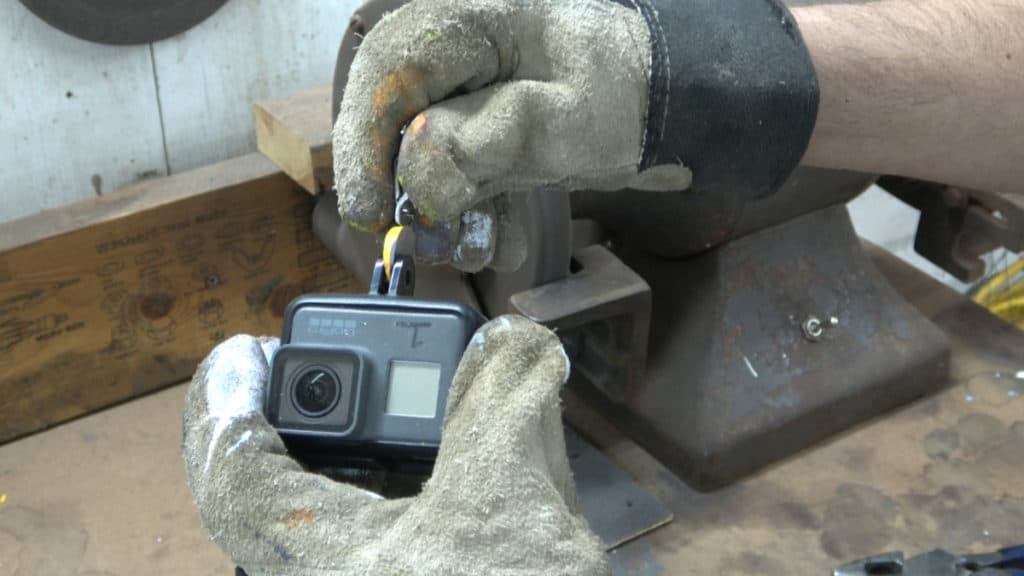
Once I got it to fit, then I drilled a hole through it.

Just like the other one, I put a bolt through it to connect the GoPro.
I love this set up, because all I have to do to connect the GoPro to my Aqua-Vu, is to clip it on.
Settings For Recording
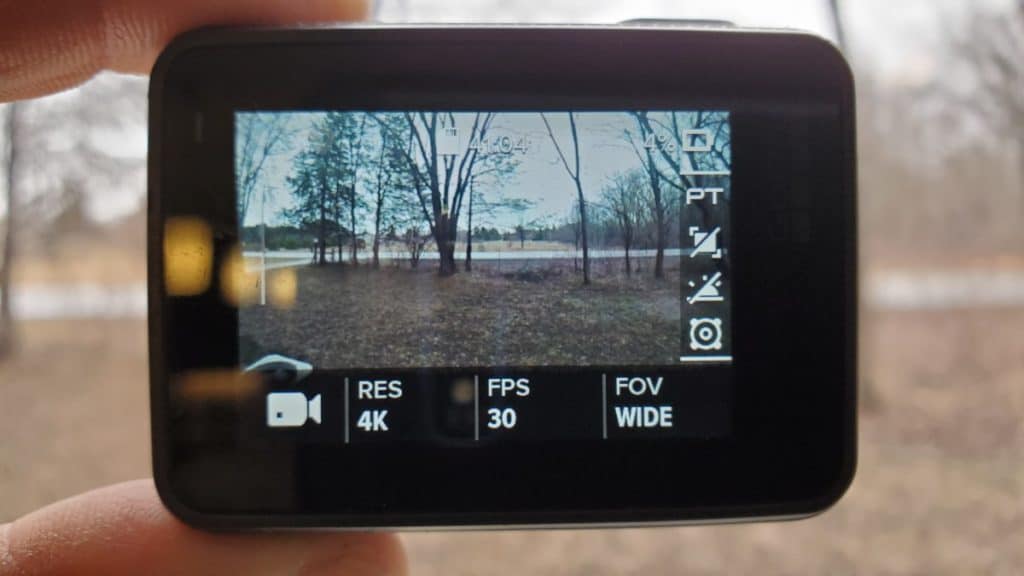
If you are familiar with GoPro and have your favorite settings, then use what works best for you. Here is how I set up my GoPro for recording. I set it to record in 4K at 30 fps and wide angle view. I use most settings on auto because I’m not sure what the conditions are underwater, so I will let the camera detect what settings will work best.
If you like using slow motion shots, then you might want to use 60 fps, if your camera is capable of it.
You can always experiment with the camera angle. Wide should give you a field of view similar to what your fishing camera sees. If you use superview, things will start to get distorted, but you will see more in view.
Since the camera will be underwater, you won’t be able to push the start/stop button. You have two options here. You can start recording, send it underwater and record everything until you pull it up and stop recording.
The other option is to record using the looping feature. If you are unfamiliar with this feature, it is one of the best things about using a GoPro, if you record fishing videos.
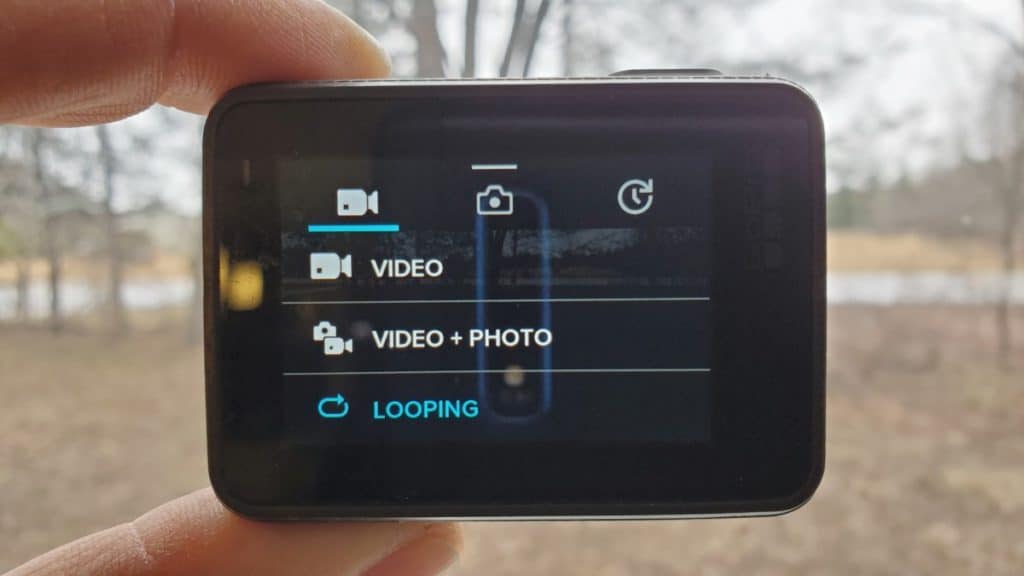
You never know when the action will happen when fishing, so you want to be recording all the time so you can capture the exact moment the fish strikes. This would take up all the space on your memory card very quickly. That’s where the looping feature comes into play.
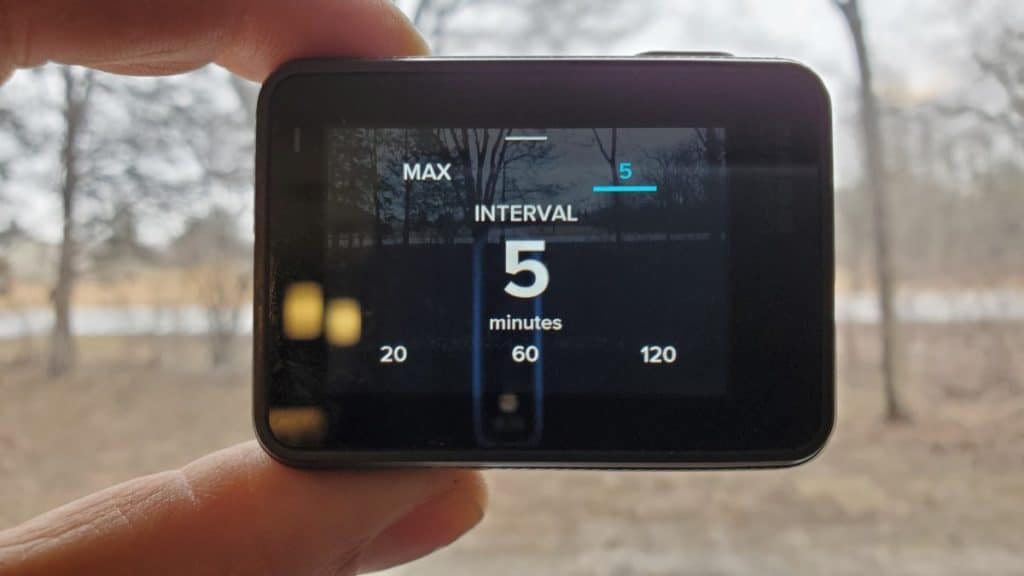
As you can see from the picture above, you can select the interval time you want to record for. For example: If you select 5 minutes, the camera will record to the memory card for 5 minutes, then it will loop back on itself and record over the last 5 minutes.
The result being that you never use more than 5 minutes of memory on your SD card. When you hit the stop button, the camera saves the last 5 minutes of video.
This works the same way whether you select 5, 20, 60, 120, or Max. Just note that the camera will break it up into five clips. If you select a 5 minute loop, you will get five, one minute clips. If you select a 20 minute loop, you will get five, four minute clips. If you select Max, the camera will record to the entire card, then start over at the beginning.
Looping works well for ice fishing. You can have the camera recording and after you catch a fish, then you will have to pull up the camera and hit the stop button. It’s a little inconvenient to do so, but the results in the end will be worth it.
On the other hand, if you are catching panfish, and the action is hot, then leave the camera down there and use a longer loop. Just don’t forget to pull it up and hit stop before it records over the good sections.
Other Options For Recording
There is another option for recording video which I have heard people doing. They use a separate camera and record the screen of their fishing camera.
I tried this myself, and found the results to be less than desirable. Here is an example of what it looked like.

This a screen shot from a Sony AX53 camcorder recording in 4K. I pointed the camera at my Aqua-Vu 715c. I was getting a lot of sun glare, and I could see the reflection of my camcorder more than what was on the screen.
This set up would work in a pinch, but it’s not what I’m looking for, so we’ll skip this technique.
Another option is sending the video signal via wifi to your phone or tablet, and recording it on there. Aqua-Vu makes a device called the “Aqua-Vu AV Connect Universal Wi-Fi Adapter for Underwater Cameras.”
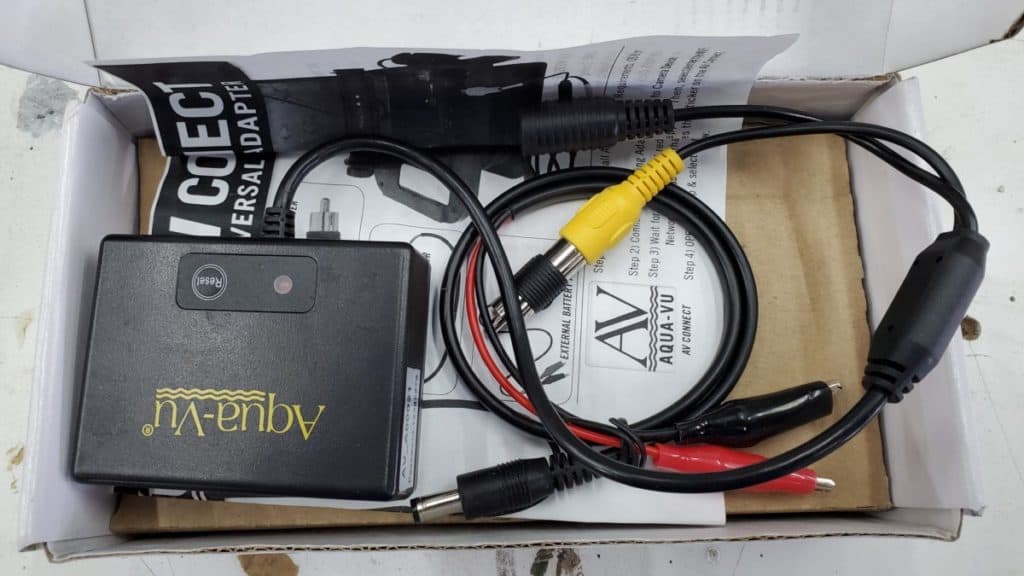
This device plugs into the AV out port on your fish camera. It becomes a wifi hotspot that you can connect your phone to. Then you need to download the Aqua-Vu connect app. This turns your phone into the camera monitor. The app has a record button that lets you record video right to your phone.
This all seems great in theory, but in reality it doesn’t work all that well. Aqua-Vu doesn’t appear to sell this item anymore, but you can still get it on Amazon, but I wouldn’t waste $150 on it if I were you.
Lets start with image quality. The image that I recorded was only 640×480. Obviously that is mainly determined by the camera it is hooked to. I only tried it on this one camera, so i can’t say for sure if it resizes the video when it sends it via wifi. See how small the image is in the lower left corner of the screen shot below.
The real problem here is that it records at only 10 fps (frames per second). This makes the video look very choppy. It also doesn’t match up with my other videos which I normally record at 30 fps.

A close up view of the image quality clearly shows how poor it really is.
I should also mention the app is very basic and poorly designed. It has such limited function that it won’t even let you delete the videos you recorded. I’ve since upgraded my phone to a Galaxy S10 plus. The Av Connect app won’t even load on this phone. It crashes every time I try to open it. So as you can see, this is not even an option anymore.
What may be an option though is the Marcum Pan Cam.
This works on the same theory as the AV Connect, by sending a wifi signal to your phone or tablet. I have not tried this system, but it has to be better than Aqua-Vu’s system. It is great if you want to remotely view your screen, but you might want to verify its recording quality before buying one.

Which Fishing Camera Should I Buy
After reviewing all the info above, the key points to take away are: Only a couple cameras have built in DVR’s, and the highest resolution available (currently) is 1080p, but it requires additional equipment to record video.
My recommendation is to get the cheapest camera that will get the job done, and spend the bulk of your budget on a good action camera, like a GoPro, to attach to the bottom of your fishing camera.
I’ve owned two Aqua-Vu cameras now, and neither one lasted more than a year. My 715c has a foggy screen, which appears to be a leaking camera housing. My Revolution Pro just shows a white screen of death. I am now in the market for a new camera.
I can’t justify spending $500 or more on a camera that just doesn’t last, so I think it’s time to explore other options. I’m planning on getting a cheaper camera from Amazon and testing it out. That way if fails, I’m out $150 instead of $500. I will be sure to follow up with a review of how it compares to the name brand cameras.
Where To Find A Cheap GoPro
I will be the first to admit, I have had my share of issues with GoPro cameras. But with that said, They still seem to be the best option out there. I don’t recommend buying the latest and greatest GoPro, then sending it to the bottom of the lake… just in case, for some reason, it doesn’t come back.
I would normally recommend buying used, but right now you can buy a new GoPro Hero 5 Black on Amazon for only $140!
If you want to buy used all you have to do is search Facebook marketplace, and you can find a GoPro Hero 5 Black, or even newer one for around $200.
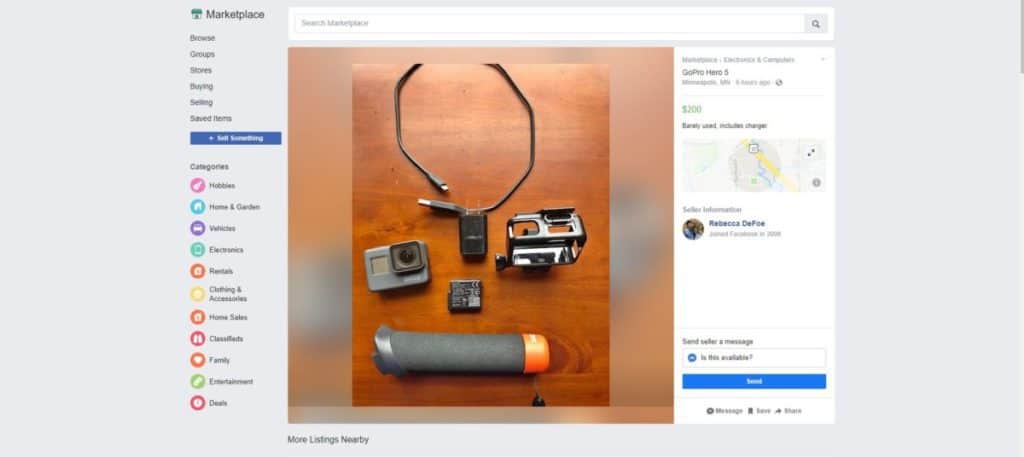
You can also check Craigslist. I’ve done a lot of business on there, but it’s really gone downhill. It seems to be nothing but scammers on there now, plus most people have migrated over to Facebook.
Conclusion
I wrote this post targeting those of us who are seeking to make high quality underwater videos. I feel the companies who design underwater cameras have not addressed this issue at all.
It’s been really frustrating even trying to gather information about this topic. The specs on the cameras seem to ignore all the important stuff I want to know. Instead, they brag about how great they are and all the features they have, like “image-clarifying TrueColor technology.” That all sounds great, but would we even know it has this feature if they didn’t tell us?

I realize I get a little worked up over this, and that most people probably won’t even care, but for the few of us out there that are looking for answers, I hope this information helps.
I’m on a quest to find the best possible way for the average person to record underwater video, that’s easy and affordable. If you have been experimenting with this also, and have ideas I have not thought of yet, please let me know.
I can be reached at: rande@gomidwestfishing.com
I hope this article was useful. I have many more helpful and interesting articles, so please feel free to browse around and take a look. I’m also building a library of the best lake reviews on the web. Check back often, as I’m constantly adding new lakes.
Thanks for reading, and good luck out on the lake.